
Lunchbag Tutorial
1:36 pm
OK, I'm going to attempt to give instructions to make one of these. I have made three so far,each one slightly differently,but the photos that follow are of the construction of the one pictured above.
Firstly gather your materials,you will need:
Outer Fabric, A fairly sturdy cotton or linen is what I have used,but you could use PUL or similar for a wipe clean lunch bag.
Lining fabric, I have used a heavyweight calico,but again feel free to use a fabric of your choice.
Inner stabilising/insulating layer. Here I have used polyester fleece as a stabilising layer,but you could use insul brite,heavy interfacing,another layer of calico....
Matching thread
Co ordinating button
Start by cutting out your pieces. The sizes I used were decided by the amount of fabric I had,but if you'd like a larger bag simply adjust the measurements below accordingly.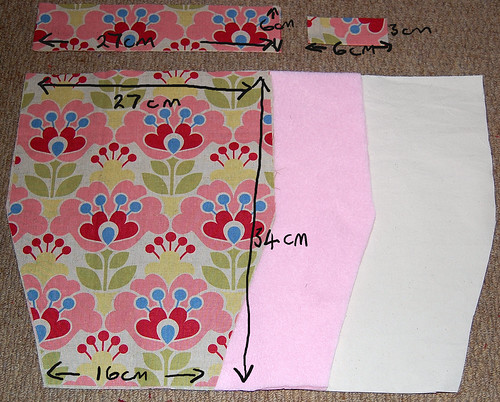
You can click on the pic for a larger image,if it's not too clear.
You can see I have cut the bottom section of the bag pieces at an angle,leaving enough of the top section to fold over and fasten the bag once complete.
The two pieces at the top of the pic are the wrist strap and the button loop.
Make the wrist strap:
Press the wrist strap piece in half lengthways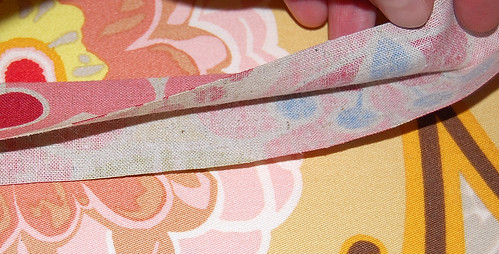
Then press each side into the middle,use the crease you have just pressed as a guide.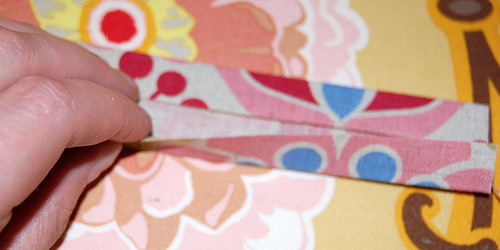
Press together and topstitch close to the edge.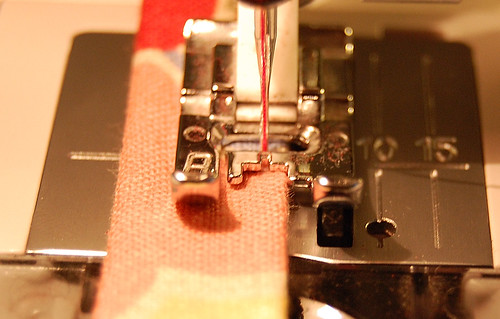
Make up the button loop in the same way.
Making up the bag:
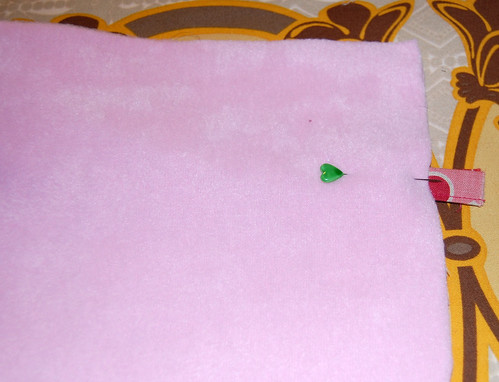
Attatch stabilising layer to wrong sides of the outer fabric layer. Here I have used a tacking spray glue to attatch the fleece.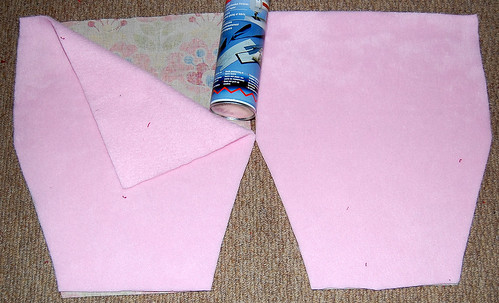
Pin wrist strap in postion, on the right side of the outer fabric,ideally it should sit about 7.5 cms down from the top edge.
Pin Outer fabric pieces right sides together and stitch a 1.5 cm seam along the sides and the bottom.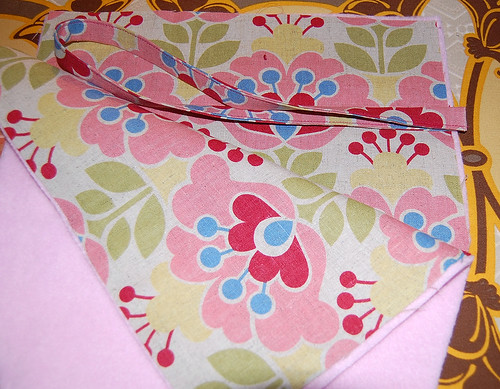
Clip corners,and trim any excess fabric.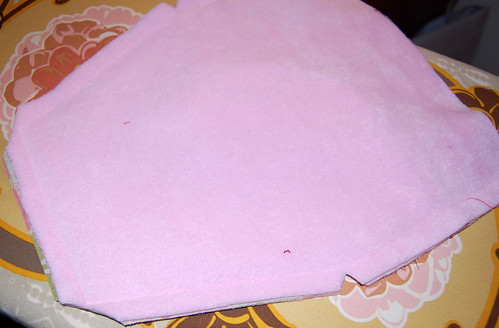
Press seams open
No need to neaten seams as all raw edges are concealed.
With seams pressed open,pinch the bottom corners of the bag together,and press again with seams lying on top of each other. Stitch across about 2cms in to box off the bottom of the bag.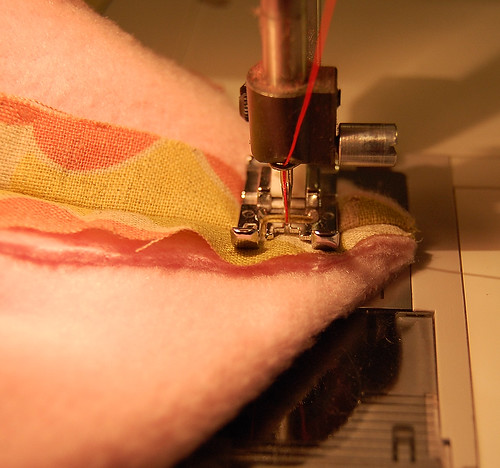
Trim if necessary. (I don't bother on thinner fabrics,but with a heavy stabilising layer it's more important)
Press again.
Make up the lining in the same way.
Pin button loop to the centre front of the top edge of the outer bag.
With right sides together pin the lining to the outer bag sandwiching the button loop in place.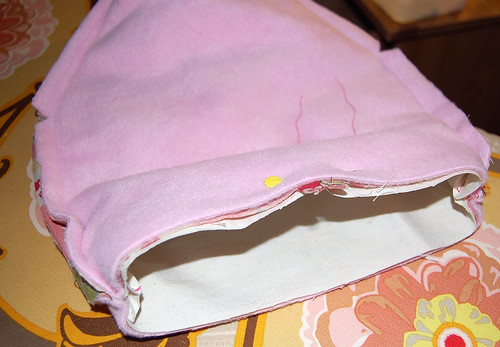
Start stitching the top edge from appox 3cms from the centre front. Stitch around (1.5 cm seam ) leaving a large enough gap to turn the bag the right way out.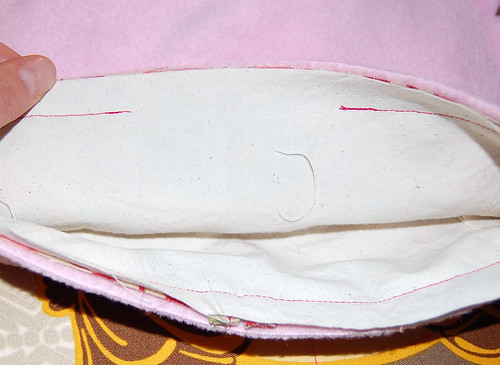
Turn the bag right way out,and press. (make sure the raw edges of the top edge you didn't sew are pressed neatly inwards.
Topstitch the top edge of the bag close to the edge.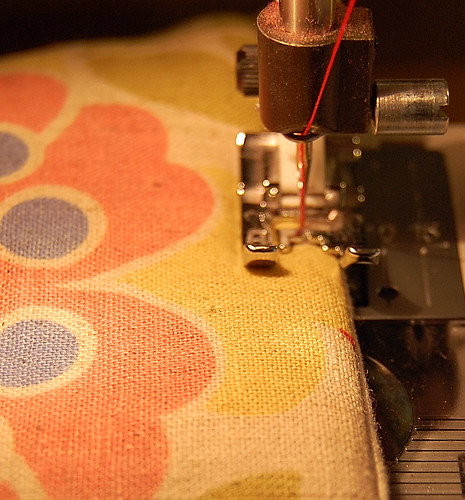
Mark the positin of your button and sew on securely. I like to use a buttonhole stitch on the reverse,it looks neat and is very strong.
Give your lunch bag a final and thourough pressing,then fill it with yummy treats.
I hope these instructions are clear,I realise the pics are not the best quality,and know I have a habit of skipping detail,so any suggestions or bits you don't understand just say so in the comments, and I'll do my best to help.


9 comments
Thanks Jeanette...I've always got snacks hanging around in my bag when we're out, so this will be great! I'm going to have a bash at this!xxxx
ReplyDeleteGreat instructions! You've inspired me to sort out my sewing stuff (currently thrown into a tiny box room and in chaos!) and have a go at this, thanks ;o)
ReplyDeleteExcellent tutorial! I posted a link to it on my blog at
ReplyDeletehttp://www.solsisters.blogspot.com
Solsisters, thanks for linking back to me,your blog looks great,gonna have a good read once the kids are off to school. ;0)
ReplyDeleteI found your blog / tutorial when trying to find a snack bag to make my daughter's. The tutorial was great. One bag down - one to go. I blogged about it here: life-is-a-musical.blogspot.com/2008/09/snack-bags.html
ReplyDeleteI can't wait to try this! Thanks for the instructions!! They look really easy to follow! And the pictures are perfect!
ReplyDeleteDear Jeanette,
ReplyDeleteAmazing idea, great tutorial!
I posted a link to it on my blog at
http://feltroaholic.blogspot.com
Thank You very much!!!!!!!
Kind regards,
Carine
Keep it up and in the future sharing more articles like this. I am amazed by the way you have explained things in this article. You are sharing a piece of nice information, it helped me. Thanks for this message. gym food bag.
ReplyDeleteVery well written article. It was an awesome article to read. about Bulk White Paper Bags for Sale Online Complete rich content and fully informative. I totally Loved it.
ReplyDeleteHi, I love to hear from readers, hate to think I'm talking to myself here, so don't be shy say hello!