

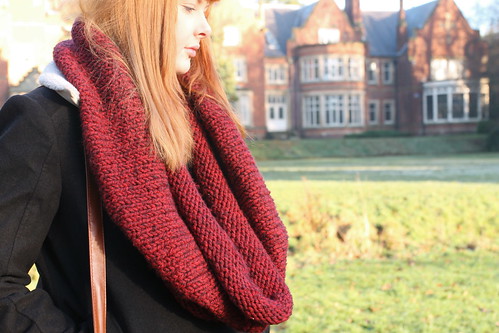
The yarn was given to me by my neighbour and friend, Emma. I simply cast on 100 stitches on circular needles and kept going until it was the right size.
Half way through, my cheapy circular needles broke, and I had to send Woody in to Purl City to buy me some new ones, he did good too,and bought me Knit Pros, which I am now in love with. (He does pass the shop on his way to work every day, I'm not that lazy!)
India, stole the resulting cowl, and it keeps her cosy while she waits at the bus stop for college.
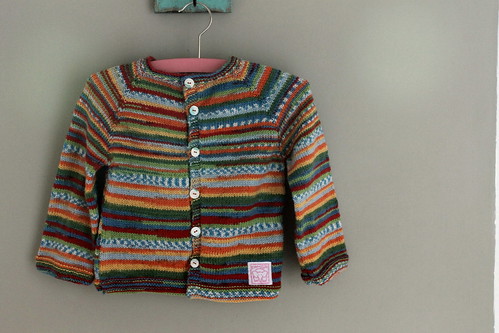
I decided to knit something really simple, and since Ernest refuses to wear jumpers these days I thought I might have more success with a cardigan.
I began following a random pattern online, which I can't find now, but once I'd got past the shoulder shaping I just winged it. The sleeves could probably have done with some shaping, but I think I might get away with it.
The buttons were 50p from Oxfam, and the label is an old one from stash.
I'm pretty happy with the results, you know considering I'm a really average knitter.
Ernest though says it's "rubbish" and refuses point blank to even try it on!
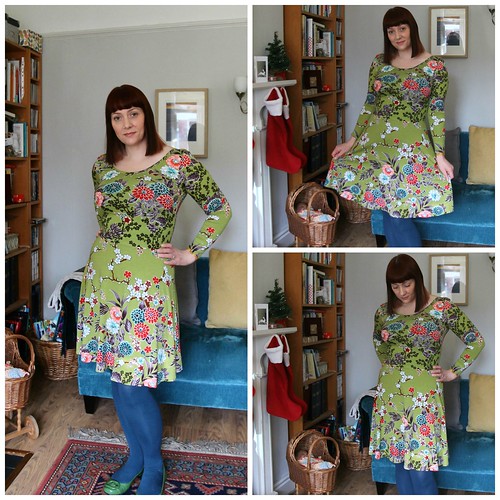
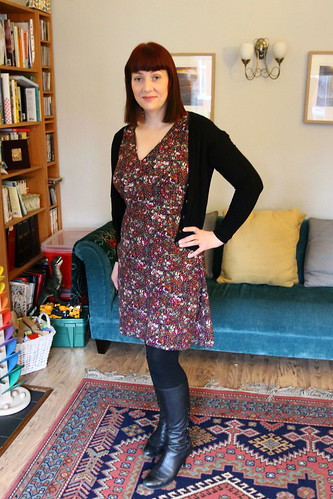
I pondered about this pattern for far longer than I should have. I do love a skater dress, they are such a fab shape on most figure types, and I own far too many cheap and cheerful skater dresses from a particular high street store.It just seemed easier to spend £5 on a simple dress. Of course, those dresses vary in quality, depending on the fabric used, are usually a touch too short, and I often have to buy a dress two or even three sizes bigger than my waist size to fit over my boobs, which often means I have shoulders that gape and bag, plus a waist that is too big...not so much of a problem at this time of year if I'm honest, scoffing chocolates like my life depends upon it as I type!
The other reason I put off buying this pattern from Kitchy Koo, is that I kept telling myself I could draft my own, and I could, but honestly time is short, and here is a dress pattern already done, all I had to do was click and buy. My final deciding factor was the promise of no FBA. (full bust adjustment)
I cut out the size 5, with no alterations, and bravely or stupidly cut into this beautiful jersey I bought in Leons about eighteen months ago.
Then the pieces sat sadly on my desk for several weeks, before finally being sewn up yesterday.
I sewed up the dress on my overlocker, except for the hems and the finishing on the neckband. I hemmed the sleeve edge after losing the band piece somewhere between the house and the shed. I also was too lazy to find my twin needle, so simply finished the hems and neck band with a single row of top stitching.
I decided against using clear elastic in the seams. This fabric has great recovery (was really rather expensive.), so thought I'd risk it. (And you have seen the title of my blog!)
I'm really pleased with the results.The fit is almost perfect, partly down to the stretch of the fabric, especially across my bust. I think if I used a fabric with less stretch I might need to go up a size across the upper bust.
The waist sits perfectly on my natural waist, to achieve this I had to half the seam allowance. I have a high waist, but the lack of a FBA means my bust not only stretches the bodice cross ways, but also lifts the waist.
I definitely will be making more of these. I have a few fabrics in my stash in mind. I may just have weaned myself off the cheap and cheerful dresses I usually buy from that certain high street store.
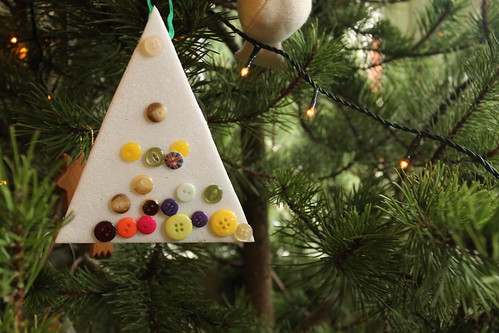
I spotted this simple idea for tree decorations the other day; triangles of polystyrene, with buttons glued on and a ribbon for hanging.
I have a whole stack of polystyrene sheets that I use for printing, and of course plenty of buttons and ribbon scraps.
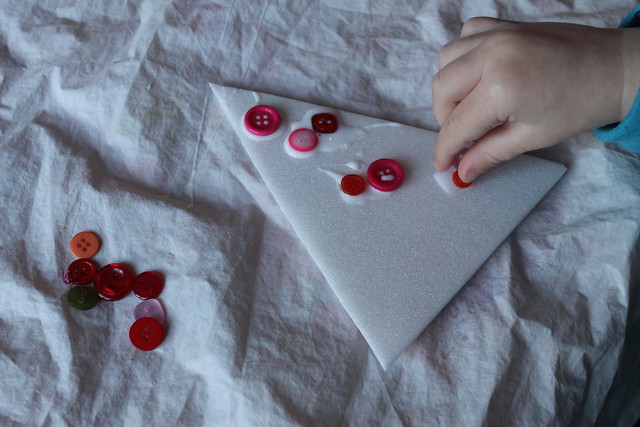
Both boys enjoyed this project. Ernest particularly enjoys using glue, his trees took rather a long time to dry!
Inspired by this idea, I cut out two circles for the boys to make snowmen in a similar way. I also cut out two simple top hats which we had fun covering in glitter.
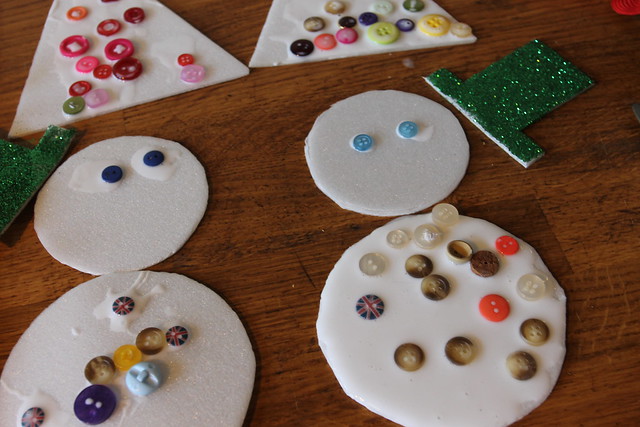
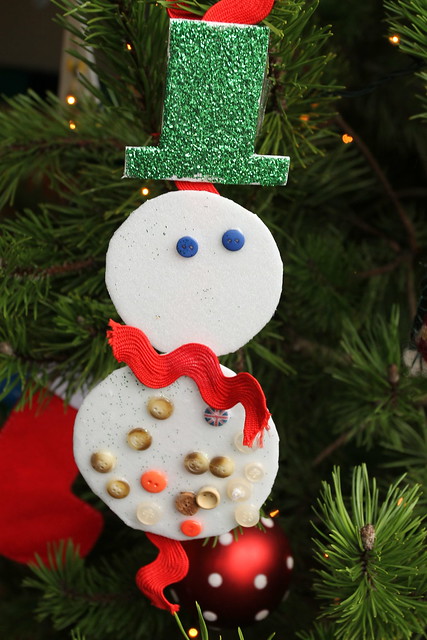
After the snowmen were dry, I added a strip of ribbon to the back with sticky tape, and a small piece of ribbon for a scarf with a blob of glue.

A quick, simple, but effective toddler make, with only a little help from me adding the final touches.
Ernest's is hanging on the tree very happily.
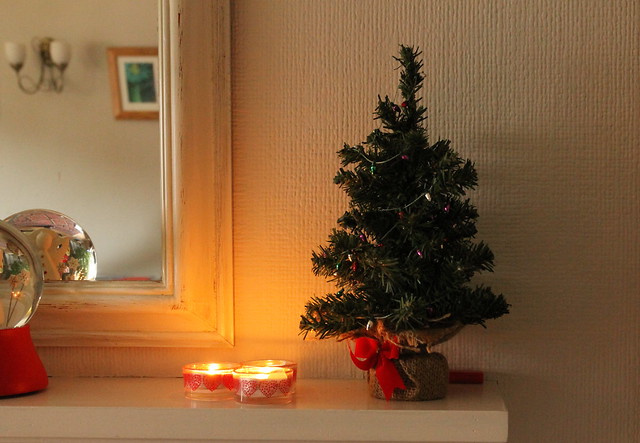
I enjoy decorating the house for Christmas, despite the fact that it's never quite the chilled out family affair I dream of. No crackling fire, gentle music and angelic children helping out here. Much more chaos, and shouting, and lights not long enough, frantic dashes out to buy more, frazzled nerves and more shouting....unyet, it's still one of my favourite parts of this time of year.
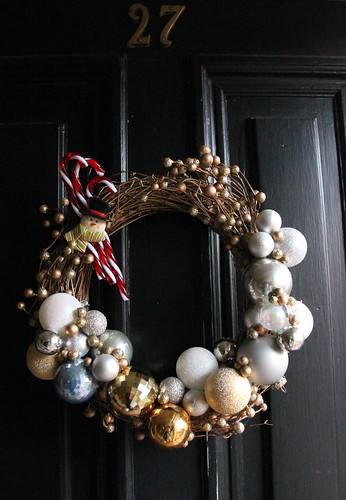
This year our door wreath was looking really rather shabby, so inspired by several I'd seen on Pinterest, I dispatched India off to the charity shop where they were selling random baubles 12 for £1. I told her to get 24, different sizes,but mostly gold and silver.
I then, set to with my glue gun, also adding some candy canes and this kitschy snowman. India and I both thought a retro style fawn would be perfect, but we were make doing and mending, and didn't own a fawn, though we now have one on the way thanks to my lovely friend Mary, who found one in her decorations and agreed our wreath needed it more than she does. So, if Mr Postman gets his act together, we will have our little fawn before Christmas.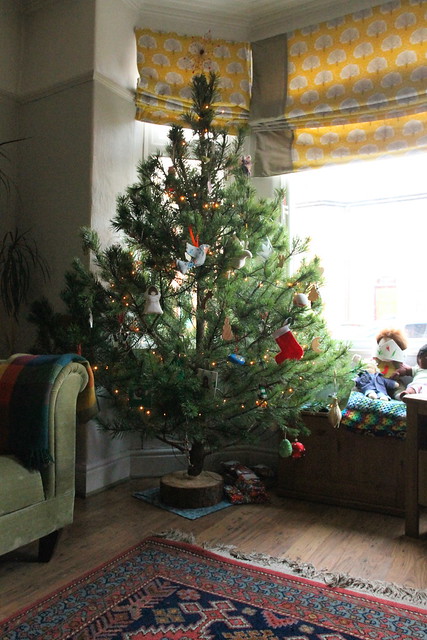
Our tree is loaded down with five years worth of ornaments gifted us for Florence, and those we have bought ourselves. Every year I look for something special for the tree just for her, this year it's a little pottery bird found in a gift shop in Beaumaris on Anglesey.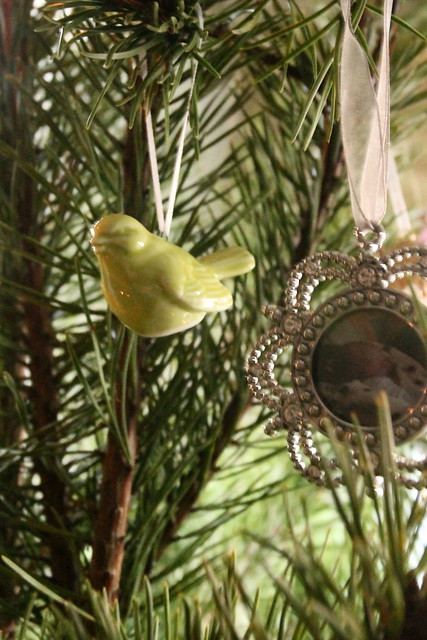
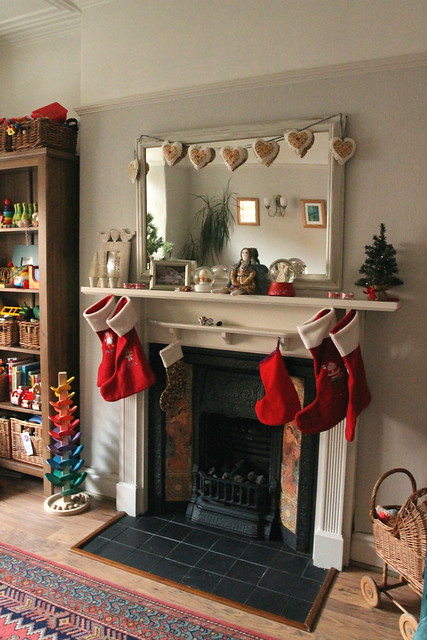
The fireplace has six stockings, one for each of our children, plus a few other special items.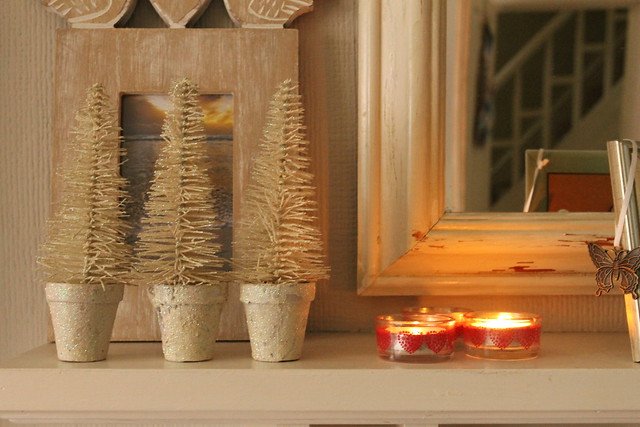
The lucky recipient of the completed dove is Megan. Megan, I couldn't find any contact details for you, so I hope you are reading this. Please email me (click on the email link icon up there on the right in the side bar), and I'll pop the dove in the post for you as soon as I have your details.
The winner of the kit to make your own Scrappy Dove is Rie, again, no contact details for you either Rie, please email me, by clicking on the icon in the top right sidebar.
I will hold on to both of these prizes until January 1st, if I have not heard from the winners by then, I will re draw.
Remember, it's easy to download the template and tutorial and make your own dove.

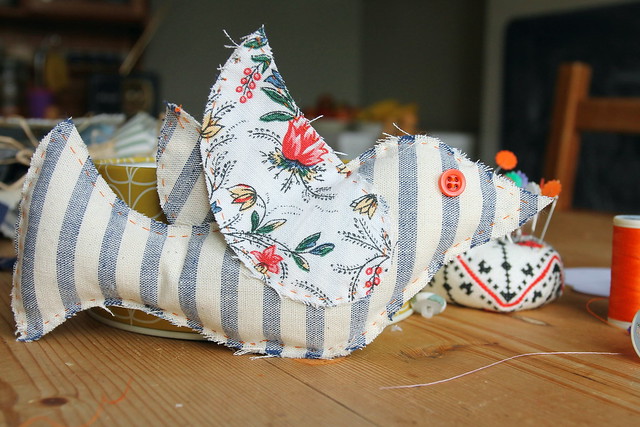
I'm very fond of them, and think it's time I shared the pleasure of stitching one of these up with my readers.
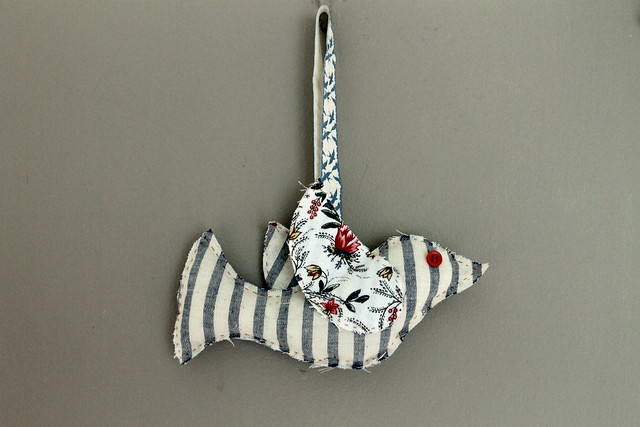
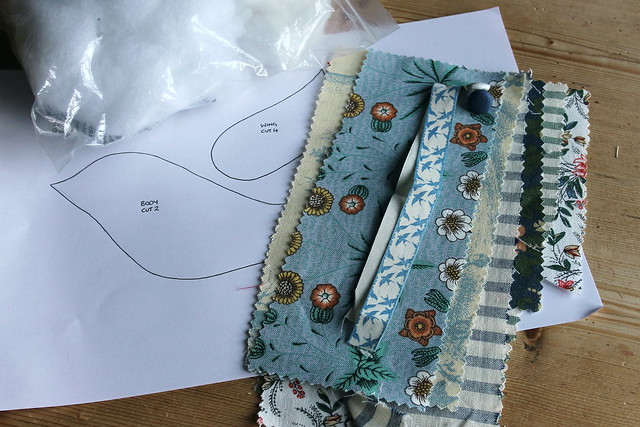
These doves are fabulous for using up small scraps of fabric, and odd lengths of ribbon, plus odd buttons.
The whole project is sewn by hand using a simple running stitch, so easy for a child or a beginner, but also a satisfyingly simple project for the more experienced.
I can while away an hour happily stitching one of these up, and they not only make great ornaments at any time of year, but can also be a lovely gift.
Download the tutorial and template, and see for yourself.
You can also use the template for applique. Have a look at my Flickr set for just a few ideas of what you can do.
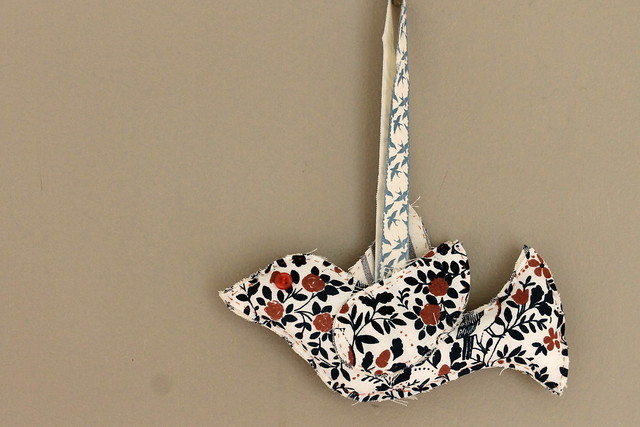
Not only am I giving you the gift of this free tutorial and template, I'm also giving away the complete dove you can see here, plus a kit to make your own!
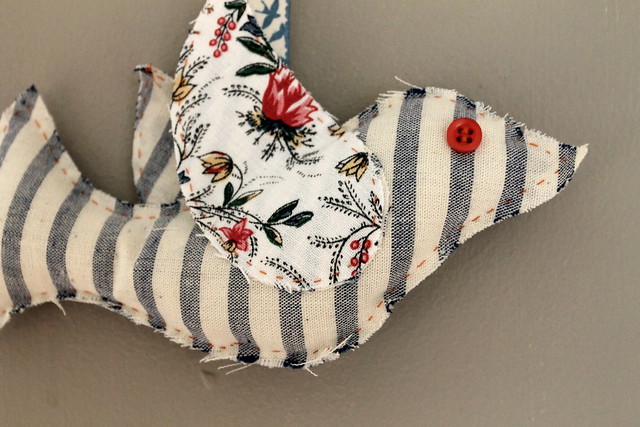
This dove is made from fabric scraps, woven in a local mill, hand stitched by me with love to adorn the recipients home, or to give as a gift.
The kit contains all you need to make one dove, except needle and thread.
I will give away each item separately. Just leave me a comment stating if you would prefer the dove or the kit and I will pick two winners at random on 15th December.
Give away open to all.
Now, most people who know me know I pretty much only wear dresses anyway, plus skirts. I rarely wear trousers or jeans, and only give in and wear yoga pants for yoga and running tights for running/walking.
I like taking part though,it's fun to share photos with friends who are also taking part.
I have been sharing "Dressember" photos with my friends on Facebook since 2011, but I believe the group had existed for several years before then.
Some people join in to raise money for a favourite cause, some people like me just enjoy chatting frocks with friends.
This year our little group has had to change it's name to Advent Of The Dresses, because I believe "Dressember" is now trademarked as an official charity, with stricter rules. That's ok for some, but for me it doesn't work. I prefer to make my own rules as I go along and have fun my way, with my friends.
Want to know more? Cassy Fry explains here.
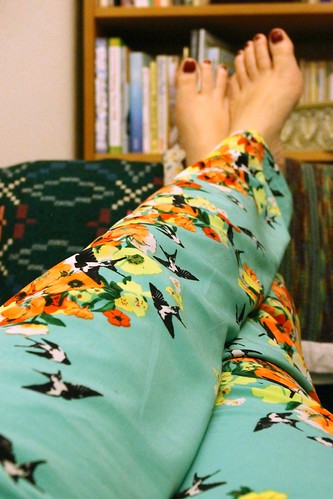
Do you know how hard it is to take photographs of pyjama trousers yourself?
These are super simple lounge pants with elasticated waist, and no other details. I took full advantage of the gorgeous printed fabric and whipped up this pair in about ten minutes, hardly worth blogging even!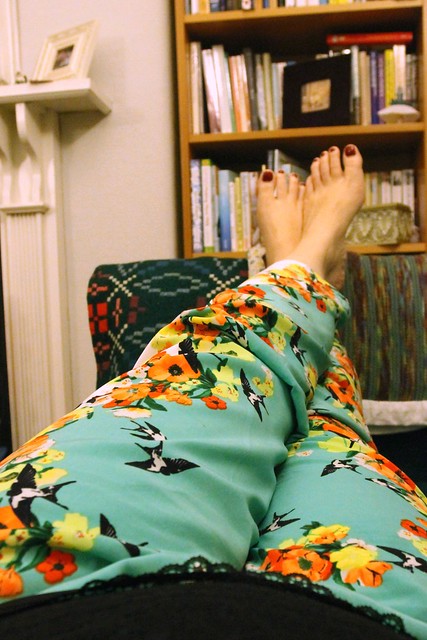
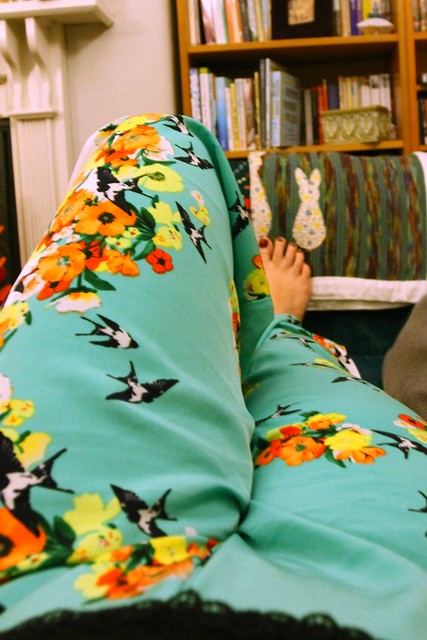
Although, they are effective like this, thanks to the lovely drapey printed fabric, I think I am now regretting not adding a deep hem cuff in a complimentary fabric, and similar waistband with a pretty ribbon tie, that would have made them extra special.
Meanwhile, I'm pretty happy, they feel lovely on, and pass for casual day wear, at least around the house.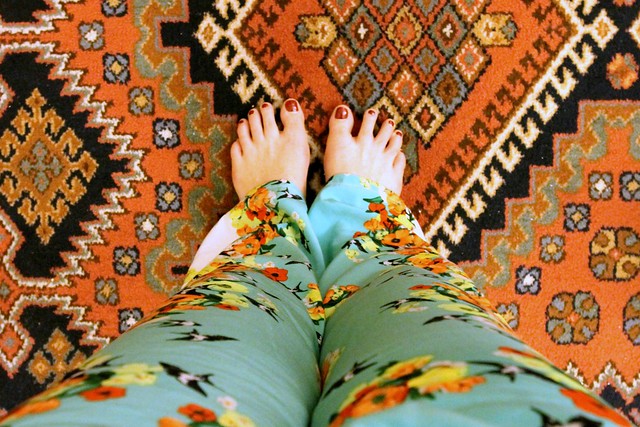
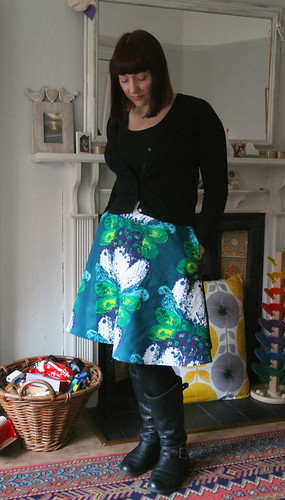
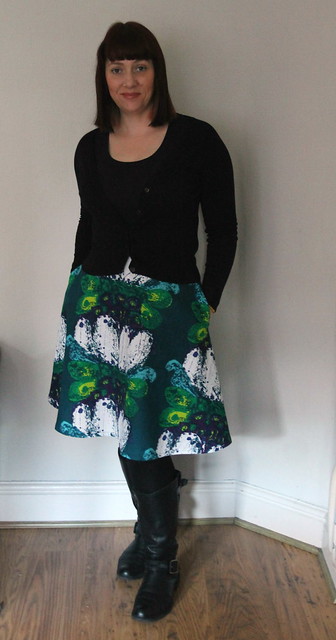
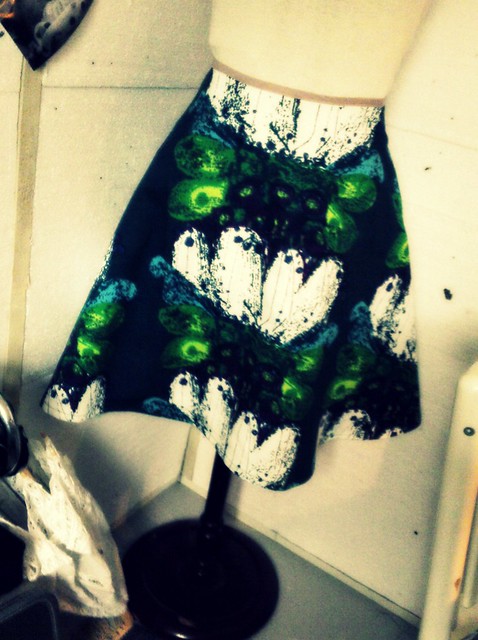
I cut these skirts out a few weeks ago, sometimes when I can't get to my sewing machine, I occupy myself by planning and cutting out in advance, then the cut out items sit patiently waiting for me to stitch them up....sometimes for quite a while.
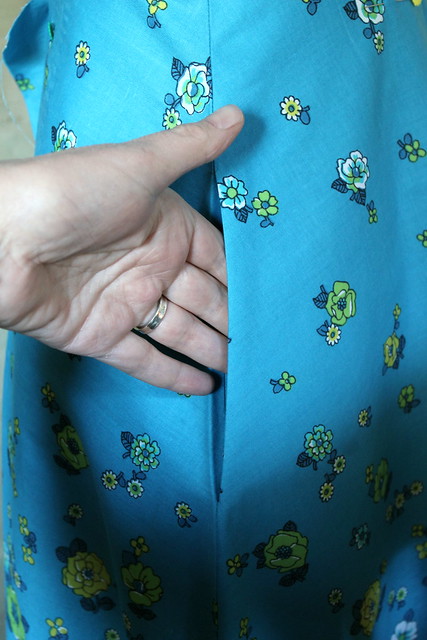
The skirt above and the one below are both made from the same pattern I used for my most recent wrap skirt.
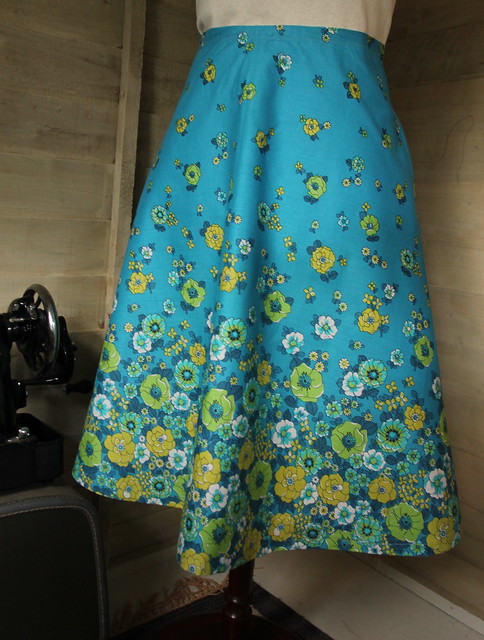
I didn't have enough of either fabric to make wrap skirts, so instead I cut out one front panel, and adding seam allowance to the centre back pattern piece, cut two back panels.
Both skirts have inseam pockets, (you might recognise the blue skirt from part three of the wrap skirt tutorial), and centre back zips, and both are finished at the waist with bias binding.
The border print fabric used for the blue skirt was bought at the Vintage Village in Stockport, and the bright print fabric used on the other skirt cost me £1 from a charity shop. Zips and all other notions were from stash.
Neither skirt would stand up to close scrutiny by an experienced seamstress, but sometimes, that's ok.
Sometimes, a day in my sewing shed pottering and not being too self critical, just enjoying the hum of the sewing machine is enough, especially if I get a couple of wearable skirts out of it. Even Woody noticed I was wearing something new this morning!
Autumn has been stunning this year, and until quite recently really quite warm. I was still working out in my shed, (I really should start calling it my studio, but can't quite bring myself to do it.) without the need for any heating until just a couple of weeks ago, I'd put off insulating too, and then it got very cold.
Last weekend I spent all day Sunday cutting and slotting polystyrene insulating boards into the spaces between each wooden baton on the shed walls and roof. I also laid some left over floor insulation Woody found in the cellar, under my rug.
There was a noticeable improvement immediately.
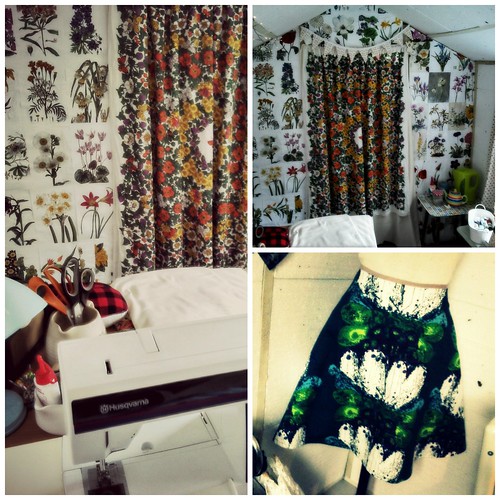
During the week I managed (despite the household being struck down by various wintery bugs) to run up a curtain for the shed door, using some curtain lining and a vintage tablecloth bought in the local charity shop.
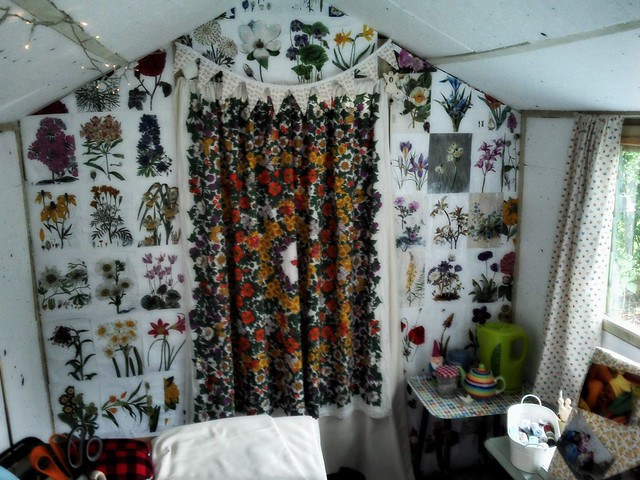
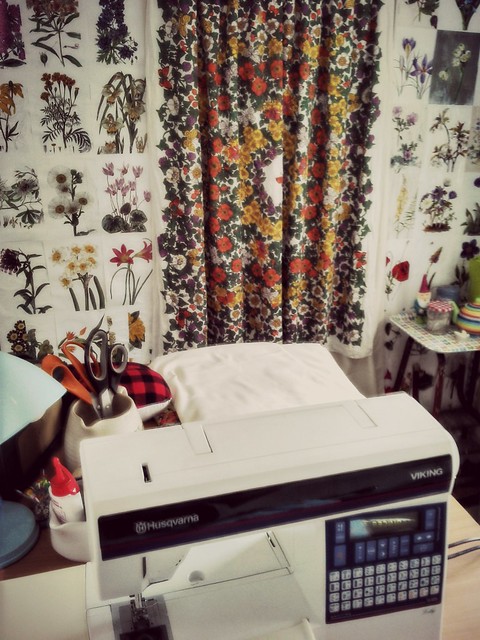
Today, I went out to the shed armed with PVA, a big brush and a pile of botanical prints I'd torn from old diaries, and had been saving for several years, and decorated one wall of the shed. The wall I face when sat at my sewing machine. I know these prints will inspire me as I work.
I'm still left with three rather boring white polystyrene walls, but I have a plan for at least one of them.
I think the ceiling will stay white polystyrene, at least for now, but I might search out a carpet remnant for the floor. The insulation on the floor and the rug are ok, but my shoes off policy in the shed means I could do with something warmer underfoot, and possibly some shed slippers...I've been dropping hints considering the big fat man is due next month!
I'm also dreaming of installing a little pot bellied stove. I use an electric heater at the moment, but I'm concerned about the cost. I'm going to have to save up for a stove though, and I'm probably pushing my luck expecting the fat man to bring me one of those.
After decorating this morning I've spent a lovely cosy day tucked away in my shed, catching up with a bit of dull, and rather lazy sewing. A pair of lounge pants and matching head scarf , and a new skirt.
I have a few things I've worked on recently that I haven't yet blogged, down to those pesky winter bugs again. Hopefully I'll get a chance this week to photograph everything and share them with you soon.

Both boys were so excited when the box arrived from Play Merrily, and were thrilled to find inside the MagnaMobiles Fire Engine and Concrete Mixer.

The concrete mixer especially was much admired. The boys didn't take long to discover the vehicles came apart and they happily switched parts between vehicles, making two different vehicles.
We've had these here for just over a week now, and the boys keep going back to them to play. I've even spotted Sid having a sneaky play when he thought no one was watching.
The toys are beautifully constructed, tactile and easy for small hands to pull apart and fix back together again.
Ernest has even taken parts from the vehicles and used them in other areas of imaginative play...the mixer section for example became a "magic machine" for one of Ernest's imaginery friends.
I can see us adding more of these to our toy cupboard.
Disclaimer: We received both of these vehicles free of charge for review.

(Though, please remember adding in seam pockets can alter the look of a skirt, so think carefully before adding them to a straight or A line skirt.)
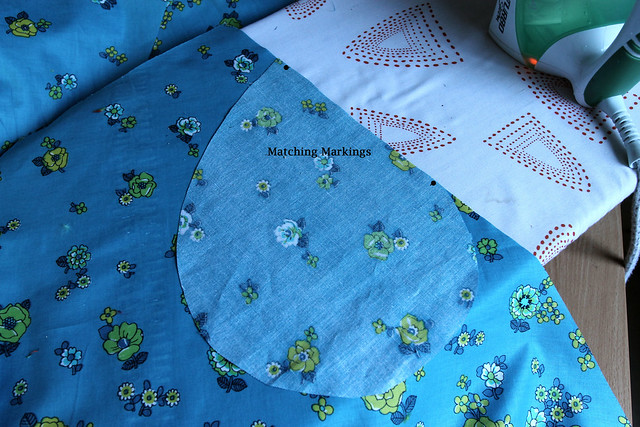
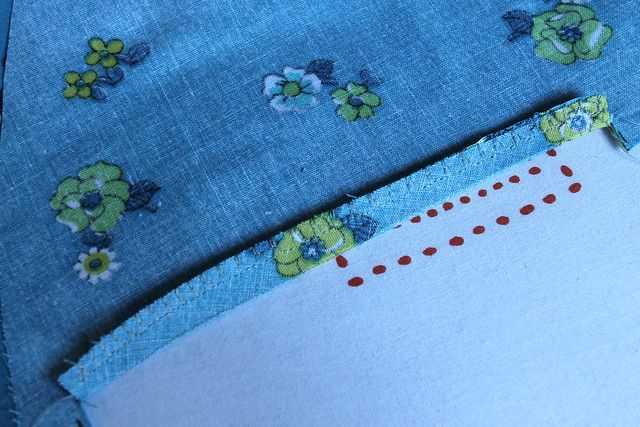
Start by placing your pocket piece right sides together with your skirt front panel, matching markings or notches. Here I have used markings on the fabric.
Pin and tack in place.
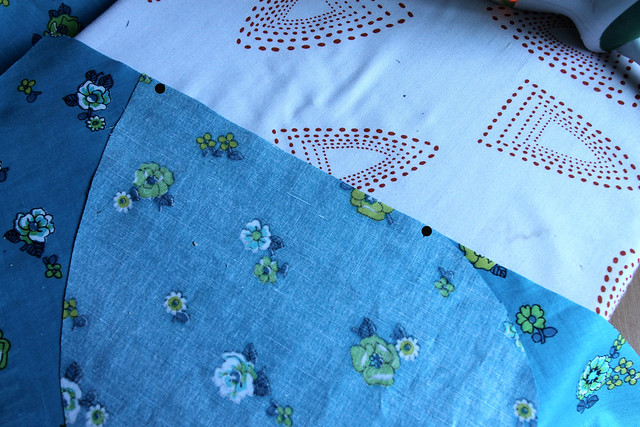
Machine stitch between the markings with a 1cm seam allowance.
Press flat.
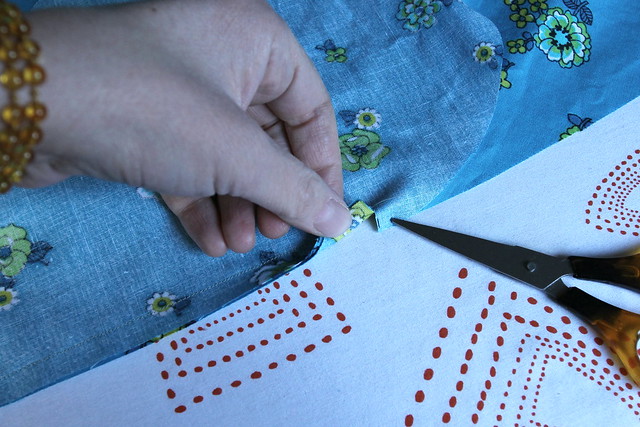
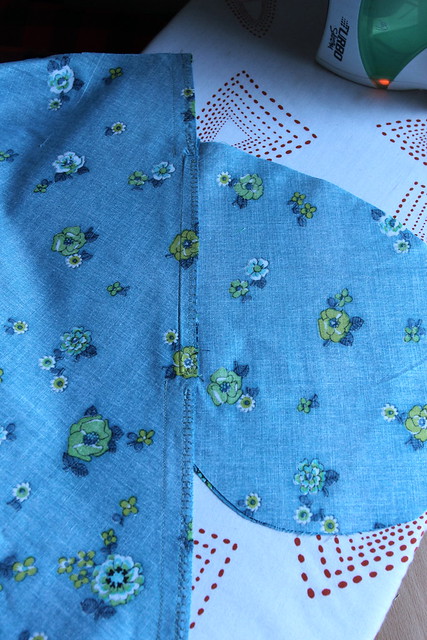
Trim carefully to stich line at markings. Neaten pocket seam in your preferred way. Here I have used my overedge stitch on the sewing machine, stiching seam edges together.

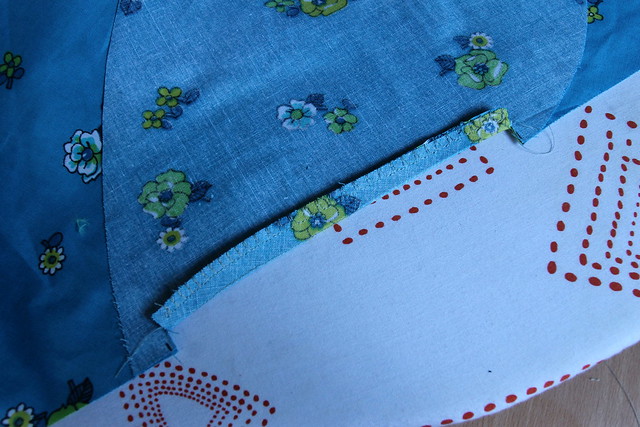
Press seam to the front.
Repeat all steps for skirt back panel, but press seam to the back. This reduces bulk .
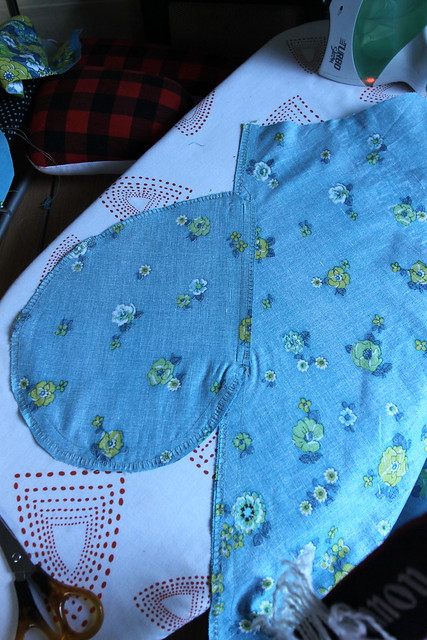
Pin and tack skirt seam above and below pocket opening. Stich a 1.5cm seam allowance, backstitching at pocket edge. Neaten and press.
Pin and tack pocket pieces together. Stich a 1.5cm seam allowance. Neaten and press.
Clip corners to reduce bulk.
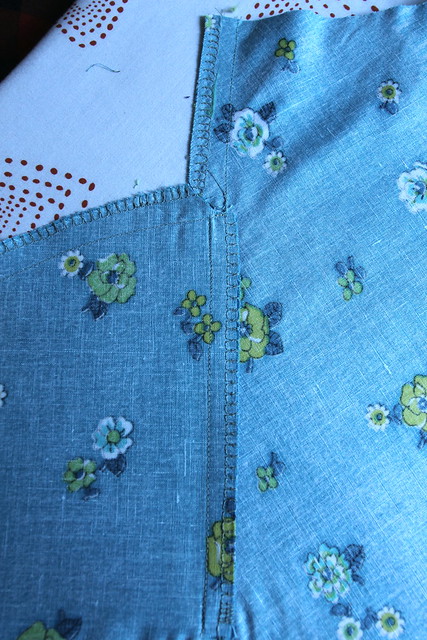
Press well. Here I have pressed the side seams to the back of the skirt.


The past few days, as all the 2013 review posts started popping up on various blogs, I again began beating myself up again for all the things I haven't done this past year.
I was feeling pretty glum, and giving myself a hard time.
That's when I decided to go through all my posts from the past year making a mental list of what I had done, and you know, I did do quite a lot, more than I remembered. Of course there is still that nagging voice in my head reminding me of how much more I could've/should've done, but it's a little more muffled, at least for now.
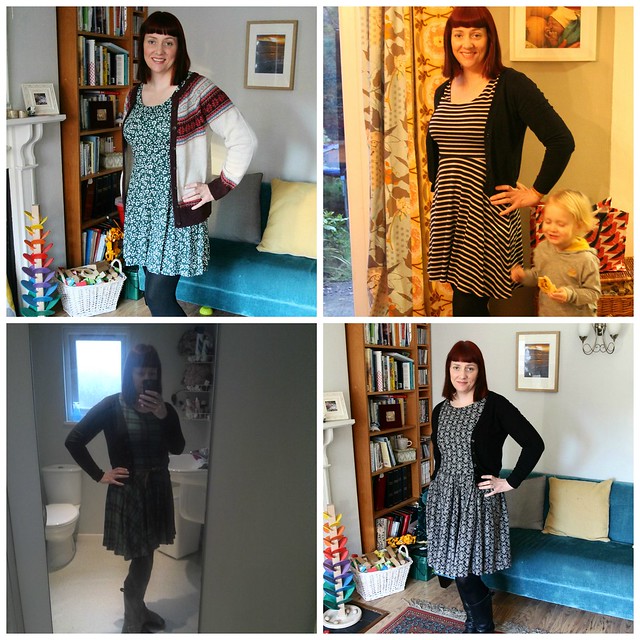
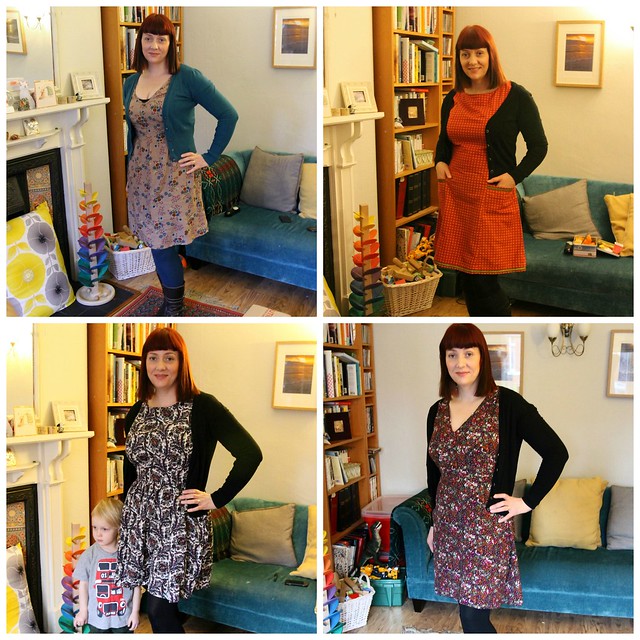
I started 2013 with the intention of sewing more for me. I put my little Flossie's Garden on the back burner , and focused more on the clothes that make me happy. Dresses, of course are top of that list!
I was thrilled to be picked as one of the finalists for the Colette Hawthorne sew a long, and thoroughly enjoyed the Fall For Cotton sew a long.
Of course my favourite dress of the year was the Prom dress I made for my lovely young friend Jemma.
I made plenty of skirts too, and a couple of pairs of pyjamas, some accessories, a fair bit of upcycling happened, and a couple of bespoke items for India.
I added five new free tutorials to the blog.
Left to right: Wrap Skirt, Scrappy Dove, Boho Kimono, Peg Bag, and Baby Bundle.
Lastly, and my favourite project of the entire year; I fixed up our garden shed into my lovely little sewing studio. (And I probably should start calling it my studio, instead of my shed.)
I love stitching away down in my shed, radio 4 playing and the chickens clucking outside, even the occasional overweight squirral stomping on the roof is a joy!
So, what are the plans for next year? I'm not entirely sure really. I have three Lady Skater dresses cut out ready to go, and a small pile of patterns and fabrics I didn't manage to get around to in 2013.
I'm mid re grading my Flossie's Pinafore, and variations to sell the patterns as part of a sew it yourself kit, and hope to have those in my Etsy store by February. So keep your eyes peeled for announcements in that department.
I'm also planning an Applique tutorial using my Scrappy Dove template. (Scarppy Dove kits coming to the Etsy store soon too)
All while trying to lose enough weight to fit back into half of the dresses in the photo above, but the least said about that is for the better.....
I think that may be enough to keep me busy for the time being?