

I've had this pattern for such a long time, but only got around to stitching it up this weekend.
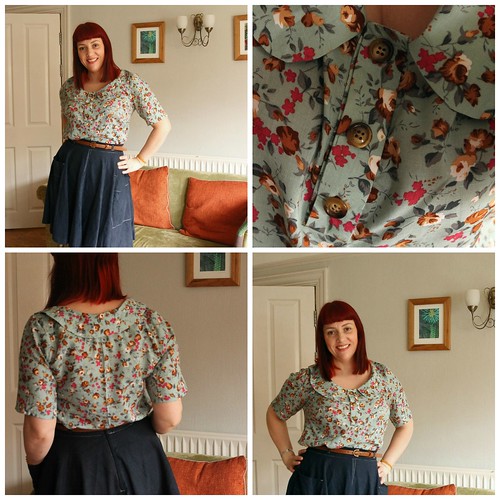
I used a fabric I've had for an equally long time. A cotton blend of not great quality, but such a pretty pattern, I thought it would make a nice practice top to check for fit.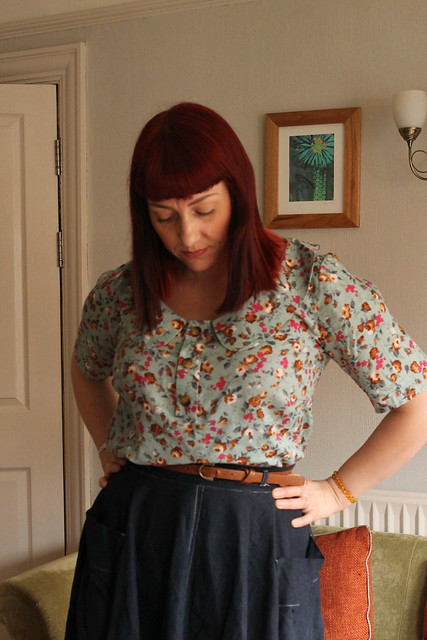
I cut out a size Large. I've gained a lot of weight recently and a fair amount has gone straight onto my chest and tummy. Checking the size chart I should have cut out an XL for my bust, grading down to a medium for my waist and hips.
If I were less lazy I should have cut out a medium and done a full bust adjustment, but I thought with such a loose fit style I'd risk splitting the difference and cut out a Large.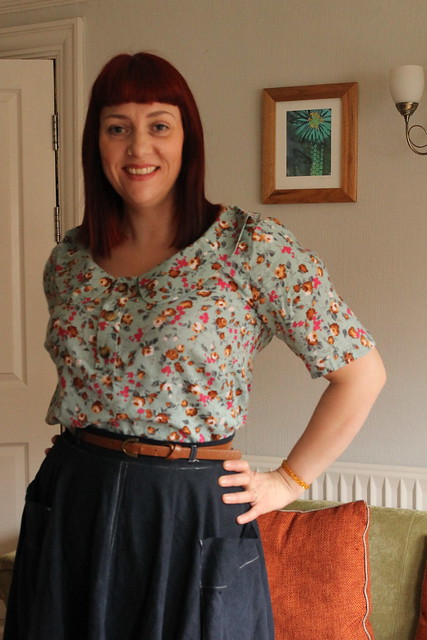
The gamble paid off, I'm pretty happy with the fit. The darts are in a good position and I like the loose style. I think possibly the neck could be smaller, but again I quite like the loose fit.
I cheated on the placket, and simply stitched my buttons right through without making button holes. The blouse fits easily over my head, and well to be honest it was getting dark out in my shed, and dinner was almost ready, I simply wanted to wear my blouse today.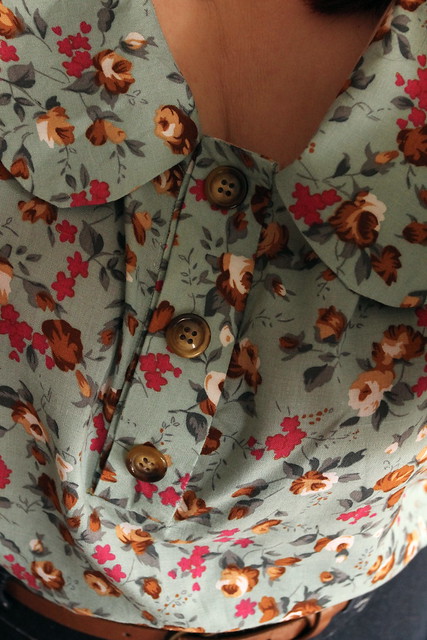
I will definately make this blouse again, and I'm thinking of using some vintage fabric to make a dress version.
Still, no use complaining. One of the pluses of having older teens at home along with toddlers is that sometimes they can be persuaded to entertain their littlest sibling while Mummy gets some therapeutic stitching down in her shed.
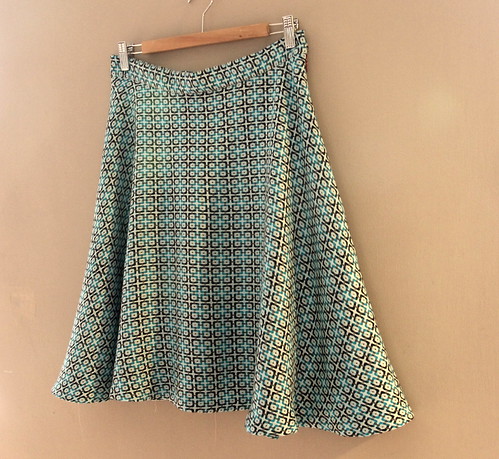
This weeks attempt to lift my spirits is another circle skirt, made from the same Maudella pattern as the skirt I made last week, and another cheeky make to add to the #vintage pledge.
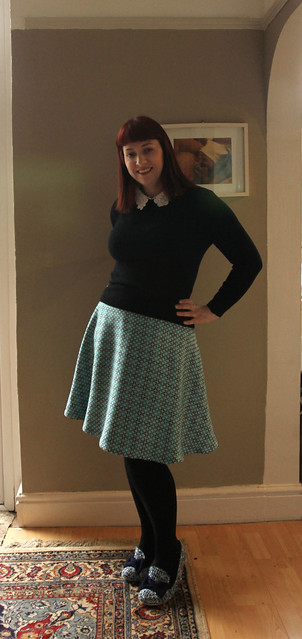
The fabric used is a very loosely woven wool. I've had this in my fabric stash for some time, some readers might remember the wrap I made with it, and my babywearing coat.
I had, and still have rather a lot of this fabric left, but it's all in odd shaped pieces, so called for a little creative cutting out for this skirt. I am hoping I can squeeze a dress out of the remaining pieces, just haven't decided on a pattern yet.
The weave on this fabric is interesting with no obvious wrong or right side, and I like both sides equally. If I do make a dress with the remaining fabric, I'll be using the opposite side than I've used for this skirt.
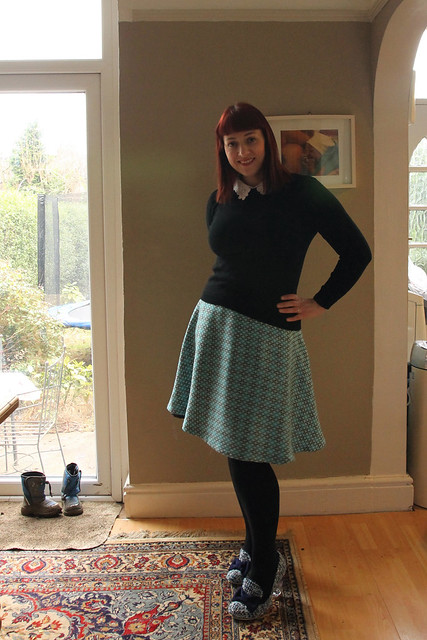
The loose weave was rather tricky to sew with, and getting the hem level has taken several days of letting the skirt hang, and careful hemming by hand. I'm still not convinced it is entirely even. I have to admit too, to still having the lining hem to complete, it's just tacked up for now, if you look closely you can see tacking stitches hanging down in the photos!
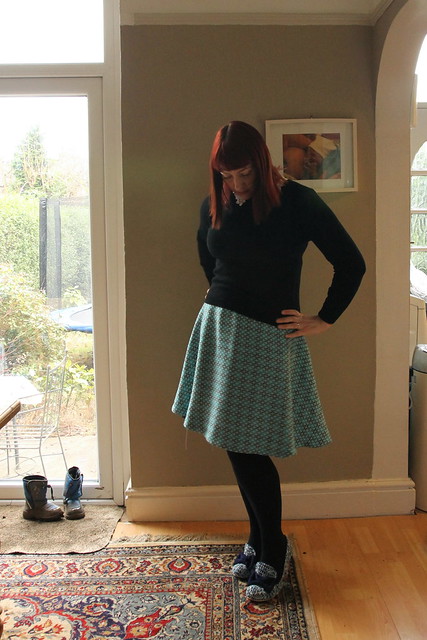
Which brings me once again to the troublesome photos. I took these this morning using my self timer. The light today is grey grey grey, my garden is a muddy swamp, so I thought maybe I could get a few shots in my kitchen that might work.
I've deliberately left in the muddy boots by the back door because, well that's how it is here right now, grey, muddy, wet.....spring will be here soon I hope!

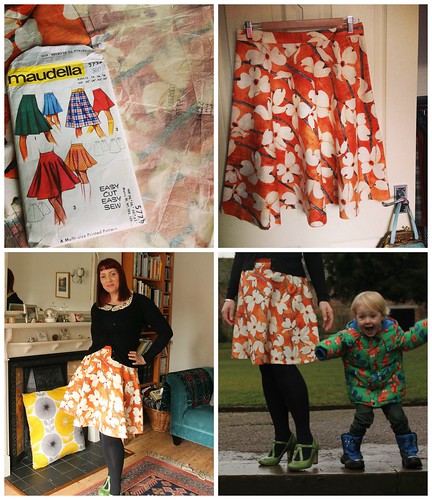

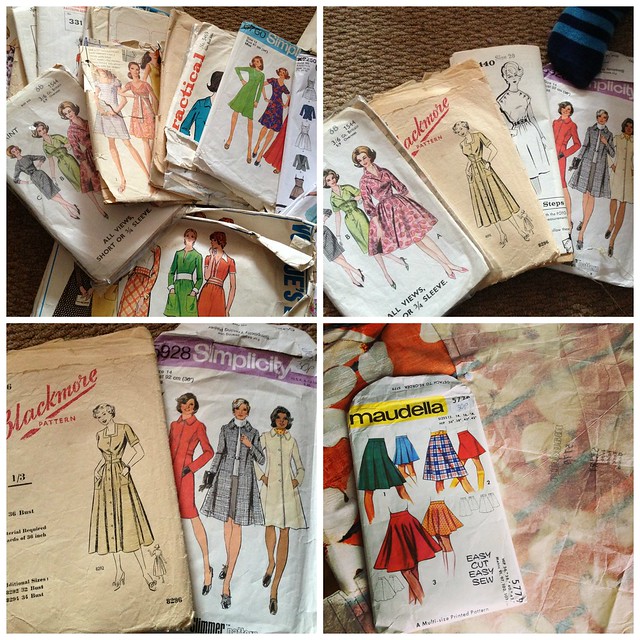
I've sorted through my current patterns and narrowed it down, I definately want to make the Blackmore shirt dress and the Simplicity coat, (in time for next winter), but began the pledge yesterday with a simple pattern for a circle skirt, which honestly feels a bit like cheating.
I used the same Maudella pattern I used for the skirt on my wool dress.
The fabric is a quilting cotton from stash, zip and button for waistband also from stash.
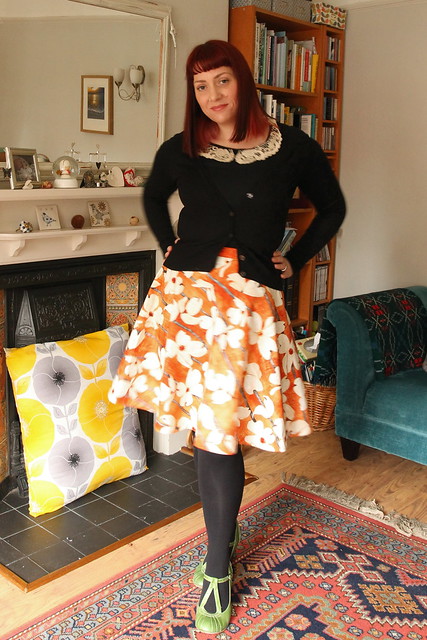
A satisfactory make following a stressful and busy week.
I don't know about others, but sometimes I need a quick simple project to ease my mood.
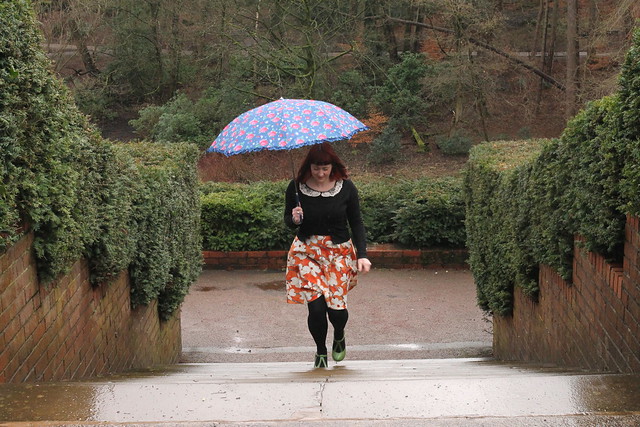
This morning, Woody, Ernest and I headed off to Bramall Hall to take some outdoors shots. I'm envious of other bloggers with their fabulous outdoor photoshoots, but sadly I can never match up.
Today a combination of poor light, rain, a toddler photobombing every shot, a teenager phoning from home every two minutes, my shyness around dog walkers and Woody's inability to understand the kind of shots I'm after, ( Not his fault, we think differently, he just doesn't see things the way I do.) means that despite taking several hundred photos I struggled to find any I'm happy to use.
I shouldn't complain, at least the toddler photobombing makes me laugh!


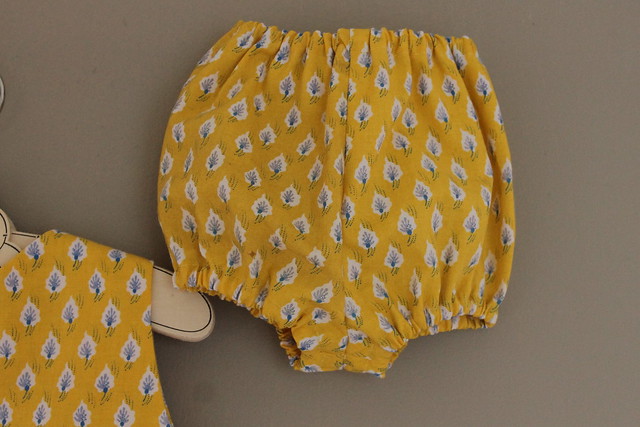
Today I'm sharing with you my free pattern and tutorial for baby bloomers you can whip up in less than an hour and using less than half a metre of fabric, often you can squeeze a pair out of fabric in your scrap bag.
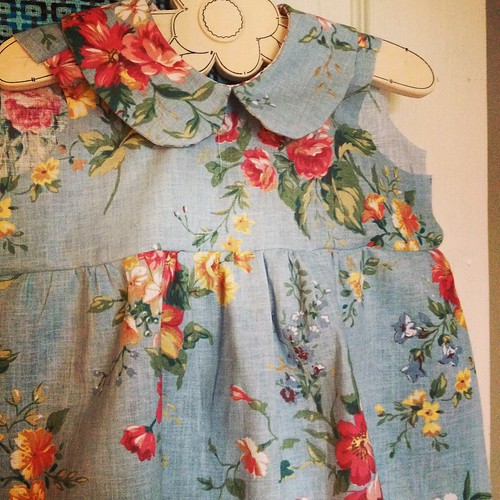
The outfit featured here is made with vintage fabric. The dress is made using the Flossie's Pinafore pattern, the applique uses scraps from my scrap bag and the Scrappy Dove template.
And good news if you are looking for patterns to use to make items to sell, I am currently changing my policy; in future if you are a sole trader and would like to use any of my free patterns or tutorials or any of my paper patterns to make items to sell at a craft fair or on your web space then please do.
All I ask is a link back to me here at Lazy Seamstress as the original designer. If you are unsure if you qualify as a sole trader please contact me and I'll be happy to discuss with you.
Remember if you do use any of my patterns or tutorials, I love to hear from you, and I especially love photos, which with your permission I like to feature on the blog, and on social media.

I thought I would make myself another of my favourite vintage dresses, but instead decided to combine the bodice of my favourite vintage pattern with a circle skirt. I was going to draft a circle skirt when I remembered I already had a vintage circle skirt pattern which would save me the bother and the maths!

The wool fabric has a poly backing to stabilise the weave, which even with the backing is a little unstable, quite a loose stretchy weave, but with such a lovely drape and feel.
I usually press my fabrics before cutting out, but this wool was not creased so I just cut it out, this turned out to be a mistake because despite folding the fabric in various ways to see which layout for the pattern pieces would be best, I totally missed a weaving flaw in the skirt panel until I had sewn it on.

After a minor panic and a bit of problem solving I decided to add three rows of big ric rac across the skirt, concealing the weaving flaw and adding some decorative detail at the same time.


I also added the same ric rac to the sleeve edges, just to tie everything in.

The wool being a faily unstable weave has stretched out very slightly at the neck edge, and at the squared off princess seams, but on the whole the fit is still good.
I also suspect that a gentle wash might tighten things up a little.
I wore this dress for an evening out with friends last night, and just as anticipated it is as comfy as my other dresses made from the same pattern I used for the bodice. A very easy dress to wear.
My friend Mary suggested adding a peter pan collar to the next one I make, I think she is onto something there!
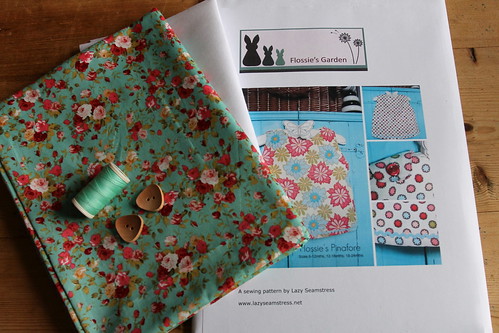
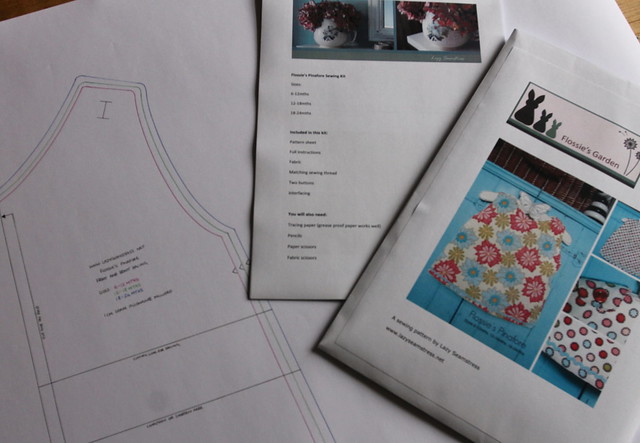
I know though that a download pattern isn't always to everyone's taste, and so with that in mind, I recently re graded the pattern and had all three sizes printed onto one master sheet.
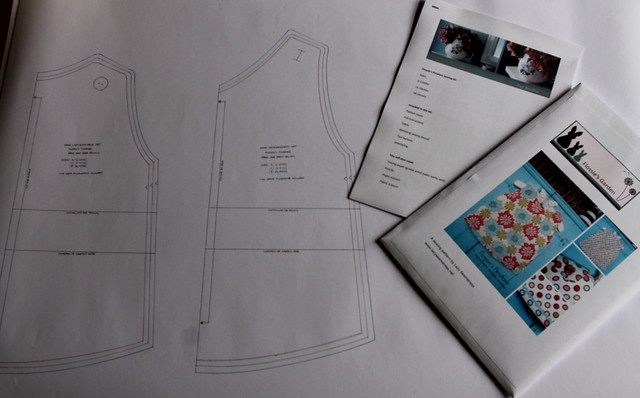
The master pattern is printed on high quality paper, so durable for many tracings.
I have also updated the instructions to include more detail,photographs and diagrams, unlike the download version which comes with a simple order of work and no photographs or diagrams.
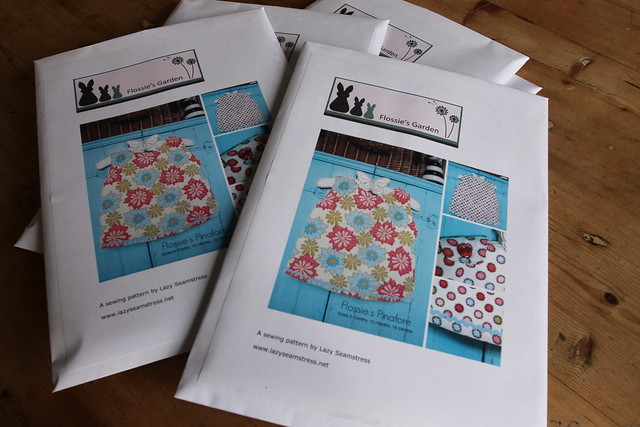
The pattern is now available to purchase in the Flossie's Garden Etsy store for £7.50.
Also available are several sewing kits, which contain everything you need to make a Flossie's Pinafore for that special little someone in your life.
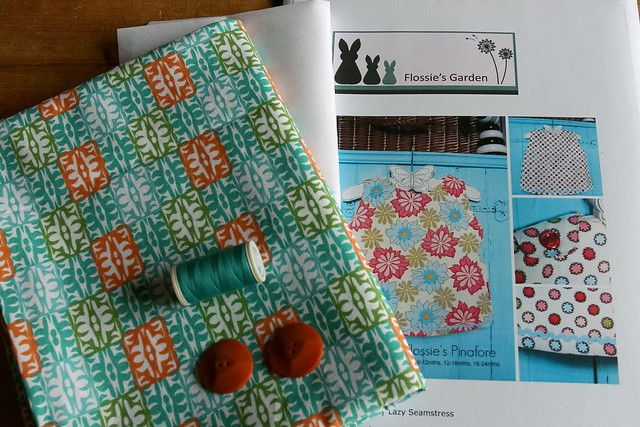
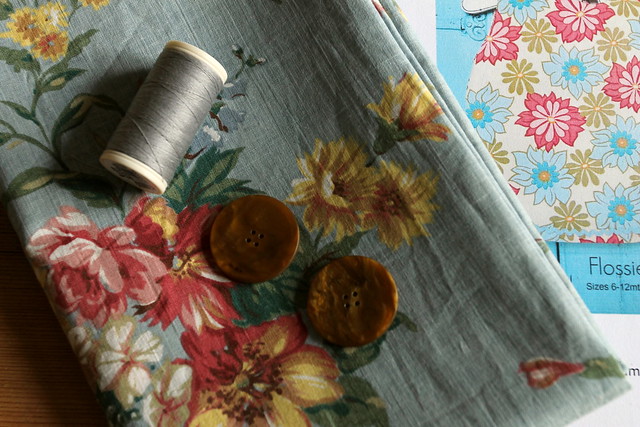
Each kit includes; the pattern, full instructions, 1 metre of cotton fabric,interfacing,1 reel of matching thread and two co ordinating buttons. The kits are priced at £19.50
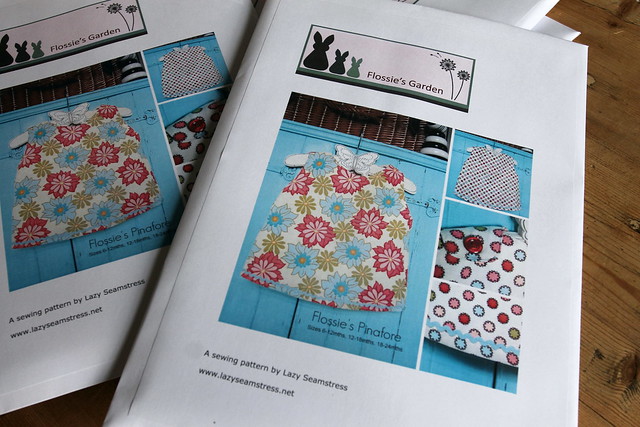
The download version will remain free on my blog,Pattern Spot and Craftsy, but if you are looking for a version with more detailed instructions, or prefer a sturdy master pattern from which to trace all three sizes as often as you'd like, or even looking for a gift , then the pattern or kit will work best for you.
Hoping this will be the first of many more patterns and kits this year.
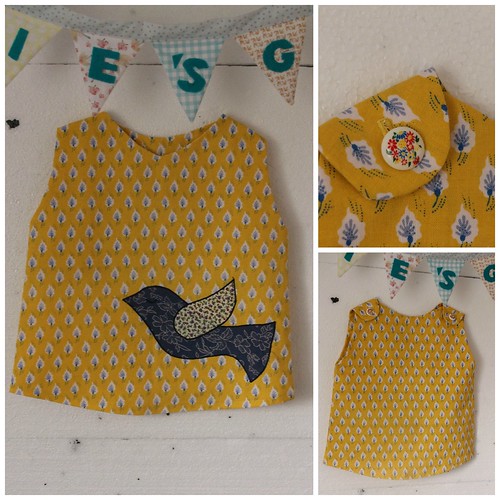
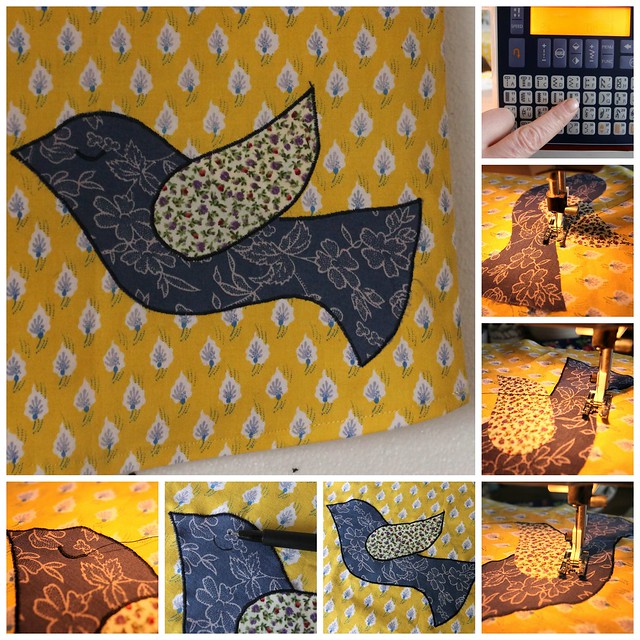
Today, I thought I would share with you how I use this template to machine applique.
You will need:
The Scrappy Dove template
Paper scissors
Fabric scissors
Pins
Fusible web such as Bonda web
Iron
Sewing machine
Thread
Laundry marker
Scraps of fabric
Item to be appliqued.
Start by printing the dove template, and either tracing the pieces (body and wing), or cutting out the pieces from your print out.
Pin your pieces to your chosen scrap fabrics.
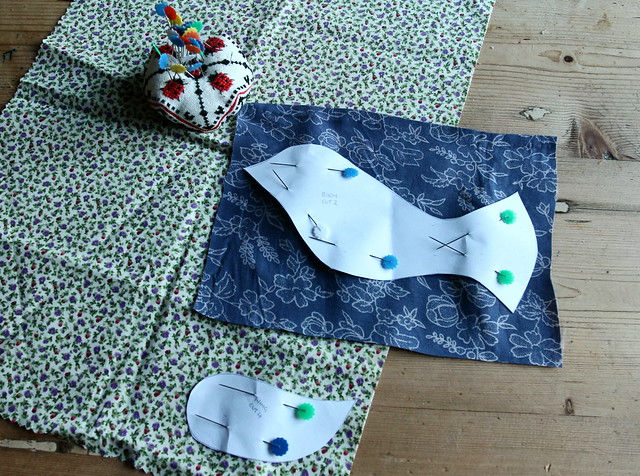
Cut out one body and one wing.
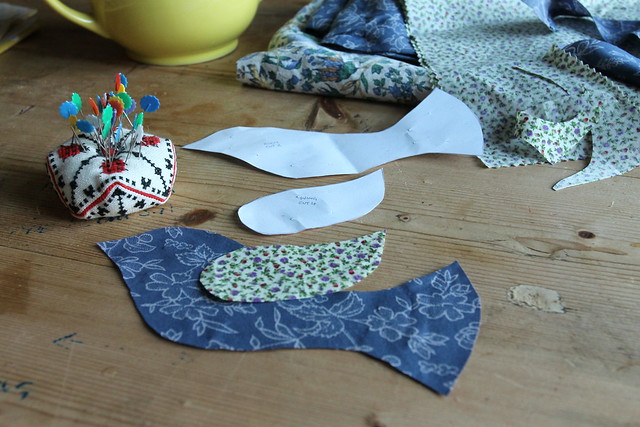
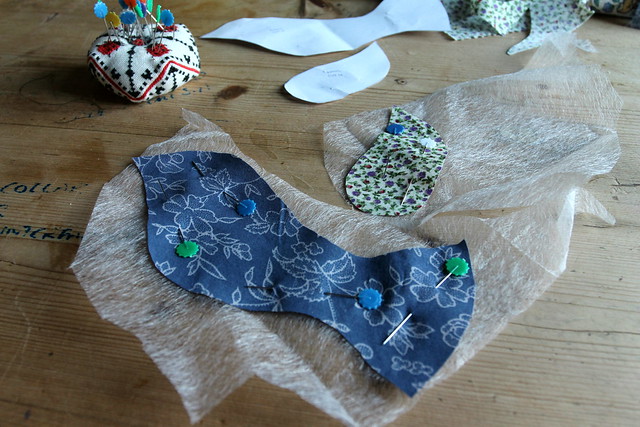
Pin your fabric pieces to the fusible web and cut out.
Position on your item, in this case I am planning to use the dove on the front of a Flossie's Pinafore, so I am using the front pattern piece before stitching the dress together.
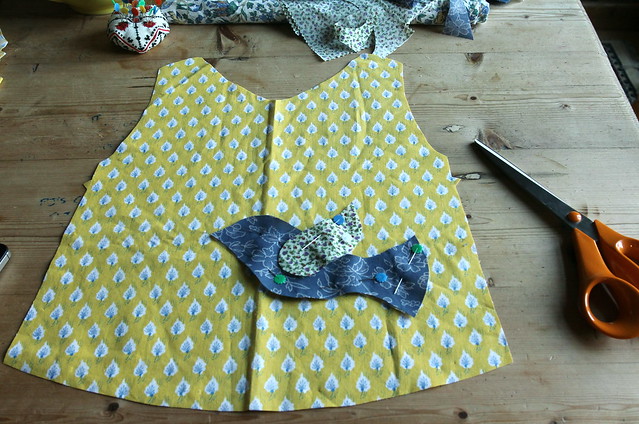
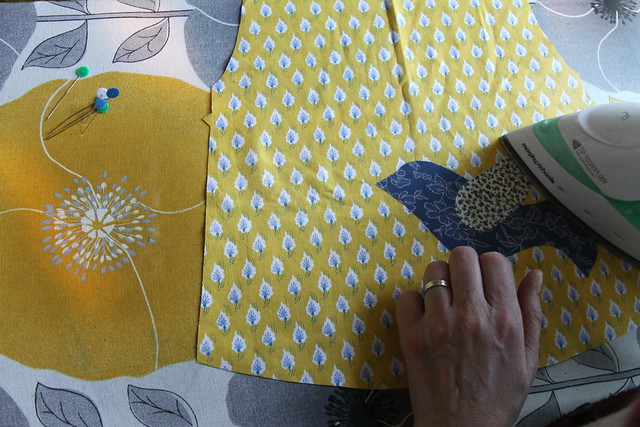
When happy with your positioning, remove pins and press in place. The fusible web will adhere the dove pieces to the item being appliqued.
Choosing a satin stitch on your sewing machine, or if your machine does not have a satin stitch a close zig zag. (usually by changing the length of the stitch to 0 and the width to 3, experiment on some scraps first! ), stitch your applique carefully in place.
I start at the edge of the wing, pivoting my machine at the corners and working around to the other edge of the wing.
Then I start again at the tip of the wing, stitching around the wing and back to the tip.
The eye is drawn on with a laundry marker and then stitched over the drawn line.
Press.
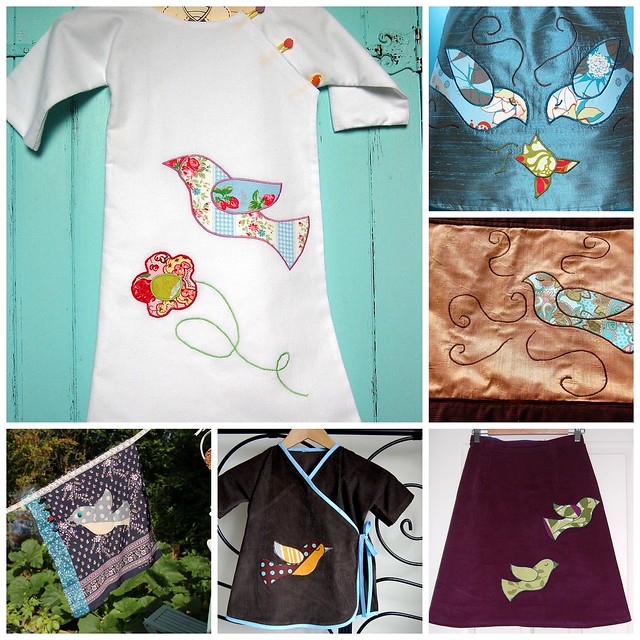
If you are feeling confident, you can add extra details, or perhaps a button for the eye, some sequins on the tail or wing, have fun, and remember I love seeing photos of anything made using my tutorials.
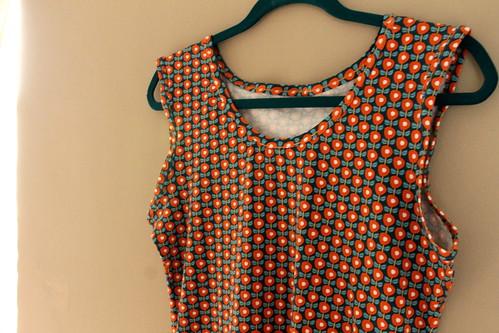
There will be no modelled photos of this third dress, it really does not suit me.
The fabric is gorgeous quality Lillestoff, bought at Sewing For Pleasure in March last year. I only bought a metre, not sure what I would do with it.
When rummaging through my fabrics looking for appropriate fabric to make more Lady Skater dresses, it popped out, but with only a metre to play with I could not have sleeves, and I had to cut the skirt quite short, though no shorter than on the red floral dress.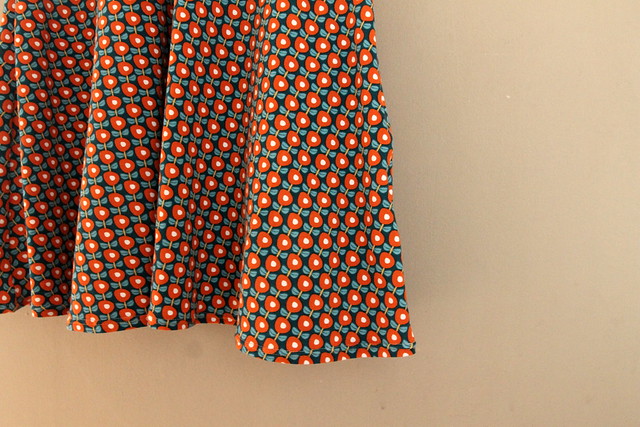
Honestly, I messed up on the arm holes, the band is too loose, but also the shoulders are too wide. I could fix this, but despite loving the fabric, it just looks horrible on me.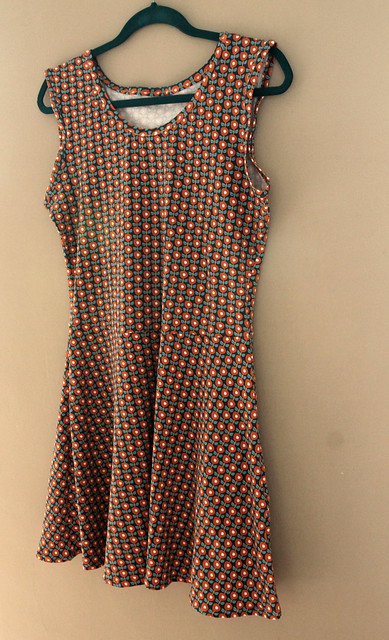
I have offered it to India, but she doesn't like it either. I'm currently debating cutting it down into a relaxed weekend skirt, or a "ate too many pies skirt" as my friend Mary calls them!
I think then I might wear it, the pattern would be away from my face and not stretched across my boobs, which is really where it looks most horrendous!
Hmmm.......
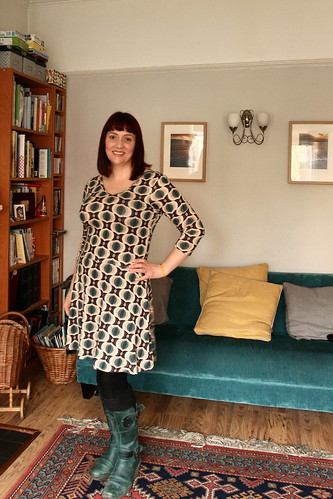
This geo print jersey was bought probably two years ago in Leons, and has sat in my stash all that time because I just couldn't see myself in it.
I thought it might work as a Lady Skater, but wasn't convinced I'd like the final dress.
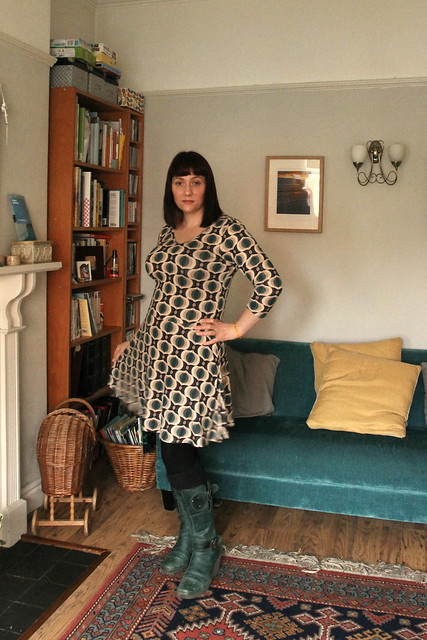
Once sewn up though, I actually like it best out of the three dresses, despite the non matching pattern at the waist and side seams, I was working with limited fabric so had to forgoe pattern matching.
The fabric is a good quality jersey with good stretch, and as with the vintage dress, I cut the bust slightly bigger this time. I have less pulling at the bust, but the printed pattern is somewhat distorted over my breasts, which I don't like.
This fabric is quite heavy, and the quantity of fabric in the skirts has pulled the waist down about two centimetres below my natural waist. Something I also experienced with the green dress. It's a minor issue and easily remedied.
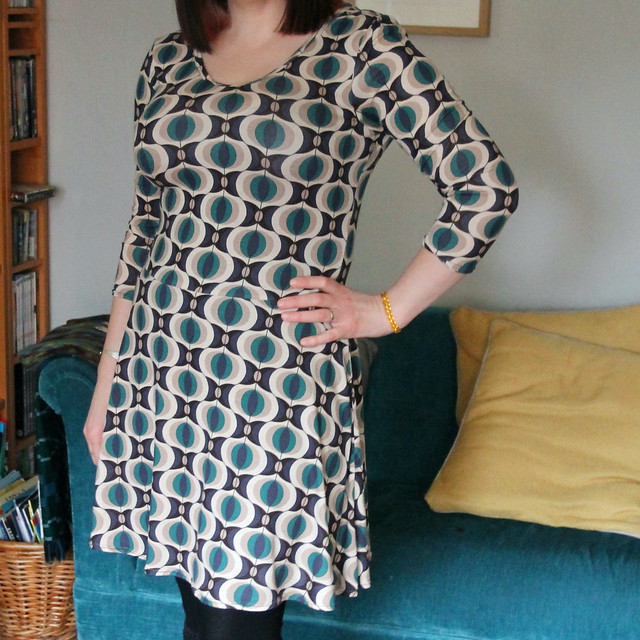
This dress has three quarter length sleeves which I also prefer.
Again, I finished the sleeves with a hem, I don't really like a band on a sleeve.
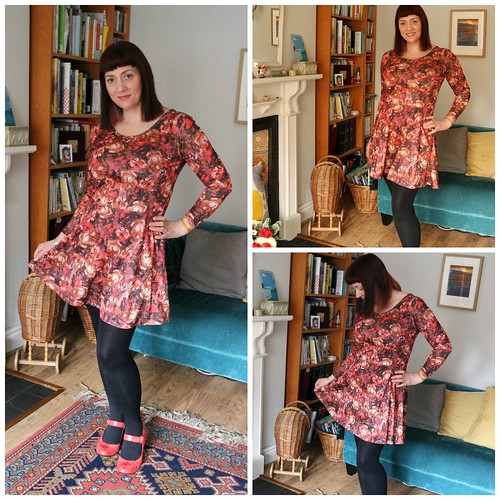
This one is made with some vintage fabric I'd bought last year at Stockport Vintage Village. I'm guessing it dates from the 60's or 70's because it's that awful synthetic almost plastic feeling fabric that was popular then. It's incredibly static, even with a full slip underneath. I didn't dare do a burn test for fear of filling the house with toxic gasses!
The print is lovely though, and it only cost £3.
It's quite a lightweight fabric, mildly see through, so a full slip is essential if I ever want to stand with the sun behind me. And although a stretch fabric, stretch in only one direction, not the ideal choice for this pattern, but I wondered if it could work.
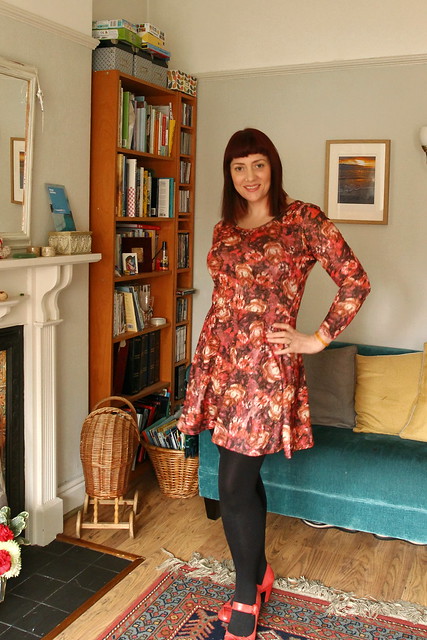
I had a small amount of pulling at the bust of my last Lady Skater dress. The pattern suggests no need for a Full Bust Adjustment for us larger boobied, but despite cutting out a size 5 for my high bust measurement, I did still have some pulling. Something most people wouldn't notice, but I became more aware of it as I wore my green dress.
Knowing that this fabric was less stretchy than the fabric I had used for my green dress, and not really wanting the palaver of doing a FBA for such a simple quick make, I added a little extra to the side seams at bust level. Sadly, I still do have some pulling. Again not terribly noticeable to most, but it is bothering me.
I also had to cut the skirt shorter and make a tiny hem because I didn't have enough fabric for the full length skirt. The skirt isn't scandalously short for a middle aged woman, and I think turned out to be an appropriate length for the style of fabric, with a feintly 60's feel . (I look scarily like my Mum in these photos during the very early 70's when I was a baby).
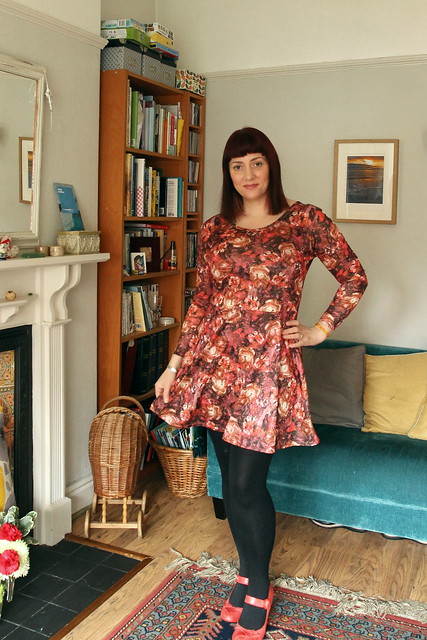
I'll be honest and say that after I'd finished this dress, I felt decidedly "meh" about it, but having let it hang overnight and tried it on again this morning, I really quite like it.
(Even if my fringe is looking rather peculiar in these photos, it's not as uneven as it looks promise!)
And the other two I made? I'll be posting about those this week.


The Birthday Romper is one of my favourite patterns for Spring and Summer.
Inspired by a photograph in an old copy of Penelope Leach's Baby and Child; I pored over this book after the birth of my eldest, India. I bought it in a charity shop, it has a strong smell of perfume, and even now just flicking through it can take me right back to my first parenting experiences.
The photo in question captured my imagination. It is of a baby sleeping in a large old coach built pram, lying on a patchwork quilt wearing an adorable romper dungaree. That photo evoked in me a feeling of calm and perfection that I can't quite describe.
The Birthday Romper embodies those quite lovely feelings I have when I see or even think of the photo, and hopefully some of that is evident to others in my final design.
This week I have been working hard grading this pattern into sizes 3-6 months, 6-12 months and 12-18 months.
I've also begun sample making.
This sample will be winging it's way to a cute little tester in the next few days.
And this one will be looking for a tester in a few days.
I'm pretty happy so far with how the sample sewing is going, and hopefully the pattern will be ready to print by mid March, just in time for Spring!
I do need a little help though. As I've already said, I so far have graded the pattern in three sizes from 3 months up to 18 months. I think these are the sizes this style most suits, but I want to ask you, dear readers, would you like more sizes? A 0-3 months, and a 18-24 months?
Please let me know in the comments. And just as a little incentive, all commentors will be entered into a little draw for one of my Flossie's Pinafore patterns.